TM 11-5895-1412-12&P
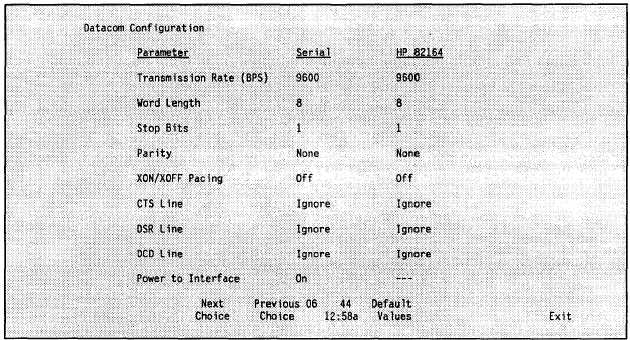
Figure 2-1, press <f5> Datacom Config.
The Datacom Configuration screen is
displayed as shown in Figure 2-3.
Figure 2-3 (f5)
To change or set values, use the function keys:
f 3 -
f 4 -
f 5 -
f 8 -
allows you to select the Next Choice at the cursor position.
allows you to select the Previous Choice at the cursor position.
allows you to select the Default Values.
EXIT to the PAM menu.
Use the arrow keys to go from line to line and set values shown in Figure 2-3.
Press <f8> to save the settings and return to PAM.
CONNECTING THE LASERJET
This section identifies the procedures for interfacing a HP LaserJet printer
to the computer.
You can configure the computer’s 9 pin connector to act as a
serial interface or to act as a HP 82164a HP-IL/RS-232 Interface.
The
LaserJet printer can be configured to accept data from the computer using both
modes.
See the following subsections for details.
A. SERIAL PORT CONNECTION
To connect the LaserJet directly to the serial port, use the HP 92221P Printer
Cable.
Serial communication port technical information is shown in Table 2-1.
Plug the 9-pin end of the HP 92221P Printer Cable into the serial port on the
back of the computer.
Connect the 25-pin end of the cable into the back of
the printer.
Turn on the computer and the printer.
2-10


